Learn how to handstand in 4 simple steps with Yoloha ambassador, Dakota Mays.
STEP 1: PREP THOSE HANDS!
You might be thinking about passive wrist/hand stretches are good prep for your handstands, but that’s actually nowhere near as important as ACTIVE hand stretches and presses.
This will help avoid injury from over-stretching, as well as strengthening the hands while building functional flexibility in the wrists.
Hold this stretch here while pressing through the fingers and knuckles.

Then do 3 rounds of 10 reps with each of these hand press exercises.
a. Knuckle Press


b. Finger Press


STEP 2: FIND GOOD HANDSTAND ALIGNMENT THE EASY WAY.
Become a master a these 3 simple poses so your body builds familiarity with proper alignment before getting upside down!
a. Plank
Plank will build the needed shoulder strength, shoulder protraction, and awareness for keeping the tailbone tucked in.

b. Hollow Body
Hollow body pose is perfect for finding that clean straight line. Remember to allow the shoulders to open, and to keep the tailbone tucked in.
Place blocks under your heels and upper back, then use your core to lift your hips in between your feet and hands for your straight line.

c. Superman
Superman pose is also great for finding that straight line, but with gravity working in different ways. Again, keep the tailbone tucked and focus on pushing the hands forward to protract the shoulders.
Place blocks under the forearms and quads, then thrust your hips upward to bring tailbone in between the hands and feet for your straight line.

STEP 3) GET UPSIDE DOWN!
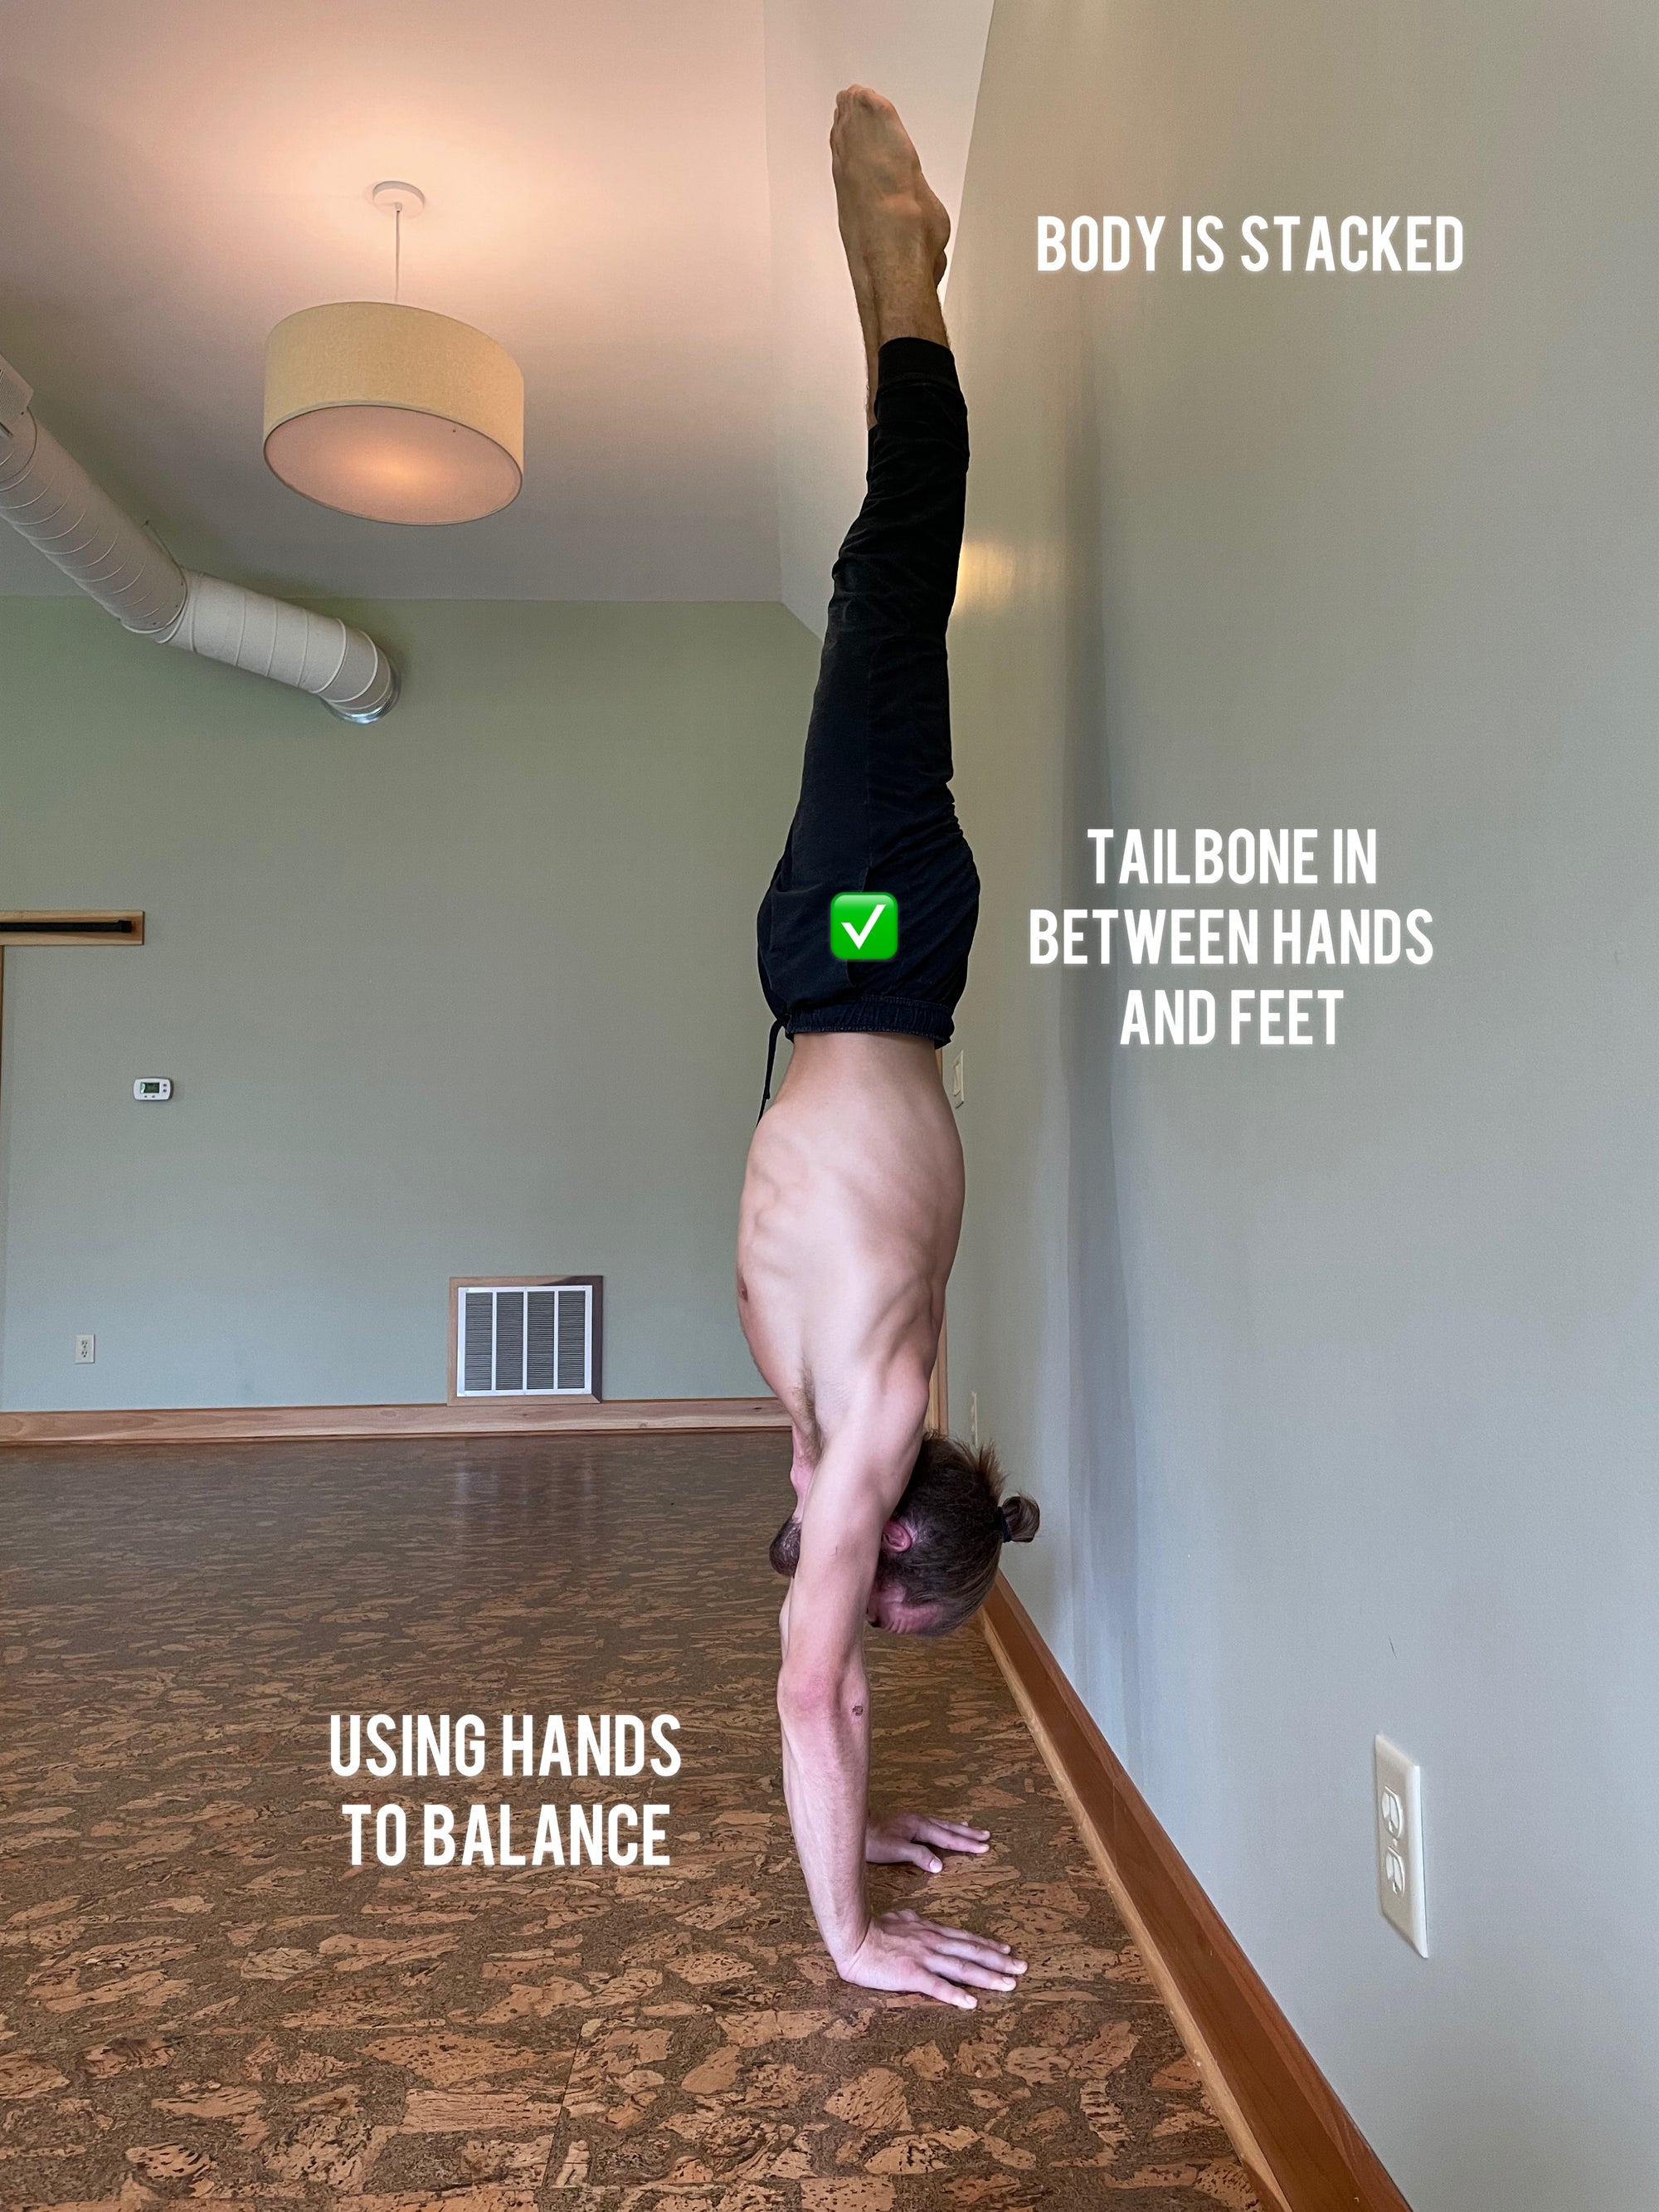
When first learning how to handstand, you’ll want to use a solid wall so you can focus on your alignment and weight-bearing comfort before trying to come off the wall.
This includes keeping the hands shoulder-width apart, the index fingers pointing forward (this can vary depending on body structure), protracting the shoulders, and you guessed it.. the tailbone tucked!

STEP 4) COME OFF THE WALL ON YOUR TERMS!
Once you feel comfortable enough to use the wall to come into a free hold handstand, it’s important that you remember this #1 rule.. DON’T KICK OFF THE WALL!
This will make sense soon. But the overall gist is that you want to control your “take off” with the push of your hands, and not by kicking the wall with your feet.
Start with your pencil handstand, and then you can explore different variations, but the rule applies for every handstand shape.
For your pencil, you’ll want to be as close to the wall as possible. Once you’re there, you’ll simply shift your hips away from the wall (while keeping the tailbone tucked of course) and as you start to feel your feet/toes become VERY light on the wall, you’ll give the last bit of take-off from pushing through the fingers and knuckles.


Once you’re off the wall, it’s a hand game. You’ll push and pull with your hands while doing your best to keep the body firm and steady.
From there, you’ll start to learn the intensity level of pushing and pulling needed to keep you in that sweet-spot :)
________________________
I hope this post helped you learn some new ways to learn this skill. Videos are the most helpful, but sometimes detailed descriptions can help connect those last dots.
If you enjoyed this and would like to learn more from me, you can always check out my short handstand tutorial videos on my Instagram (@maysyoga), or my YouTube channel (Mays Yoga).
But for those of you who want a complete guide to handstanding without a spotter, you should check out my Handstand Academy program where I teach you the “REP Method” 😜
Either way, I hope this was helpful for your practice! Namaste 🙏🏼💚
Keep up with Dakota!


